
Web SDK Setup & Integration
Web SDK Setup
Fourthline's Web SDK smoothly redirects clients from your website using a QR code or SMS to a new browser window on their mobile device. The mobile flow on the device is hosted by Fourthline on a secure, private subdomain. Alternatively, you can embed the SDK in your mobile site.
The SDK takes care of the user journey and orchestrates modules with a streamlined API flow. You can also easily level up from single products to multi-product solutions with no additional API requests.
All required images and data are captured in our best-practices UI and automatically uploaded to Fourthline for processing. You don't have to handle sensitive personal data yourself.
The following sections explain how to set up the Web SDK and the input needed to configure the SDK to your requirements.
SDK Configuration
During the onboarding, Rabo Identity Services will request the following information in order to setup the account correctly.
| Configuration | Description |
|---|---|
| Desktop redirect URL | This refers to the URL of your web application from where you want to initialise Web SDK. |
| Mobile URL | This refers to the URL when the user is navigated to the mobile device from the desktop. This is hosted by Fourthline and there are two options 1. Setting up your own custom domain 2. Setting up a Fourthline domain, for example; https://companyname.app.fourthline.com Your preference is discussed during the onboarding phase |
| UI Customisation | Provide the styles file to customize the UI and your logo. |
User interface
Fourthline provides the mobile-responsive UI, which is built in line with industry-standard best practices for user experience (UX):
- The UI includes guidance and animations to help users understand the journey.
- Users may not know how to take photos with appropriate lighting, background, and framing, which can lead to processing delays or unnecessary rejections. The UI provides users clear instructions and real-time feedback to optimize image quality and maximise conversion.
- The UI validates data entered by users in real time to reduce input errors.
- You can localize the UI text in a range of languages, and customize fonts and colors to match the look-and-feel of your brand.
- Fourthline collects analytics data and continually updates the UI to improve conversion, meet evolving regulatory requirements, and keep pace with market trends in UIs and UX.
Redirect flow
You can redirect users from your desktop or mobile website to the mobile flow in a new browser window on their mobile device via QR code or a link in an SMS. This flow is typically hosted by you and embedded in your website.
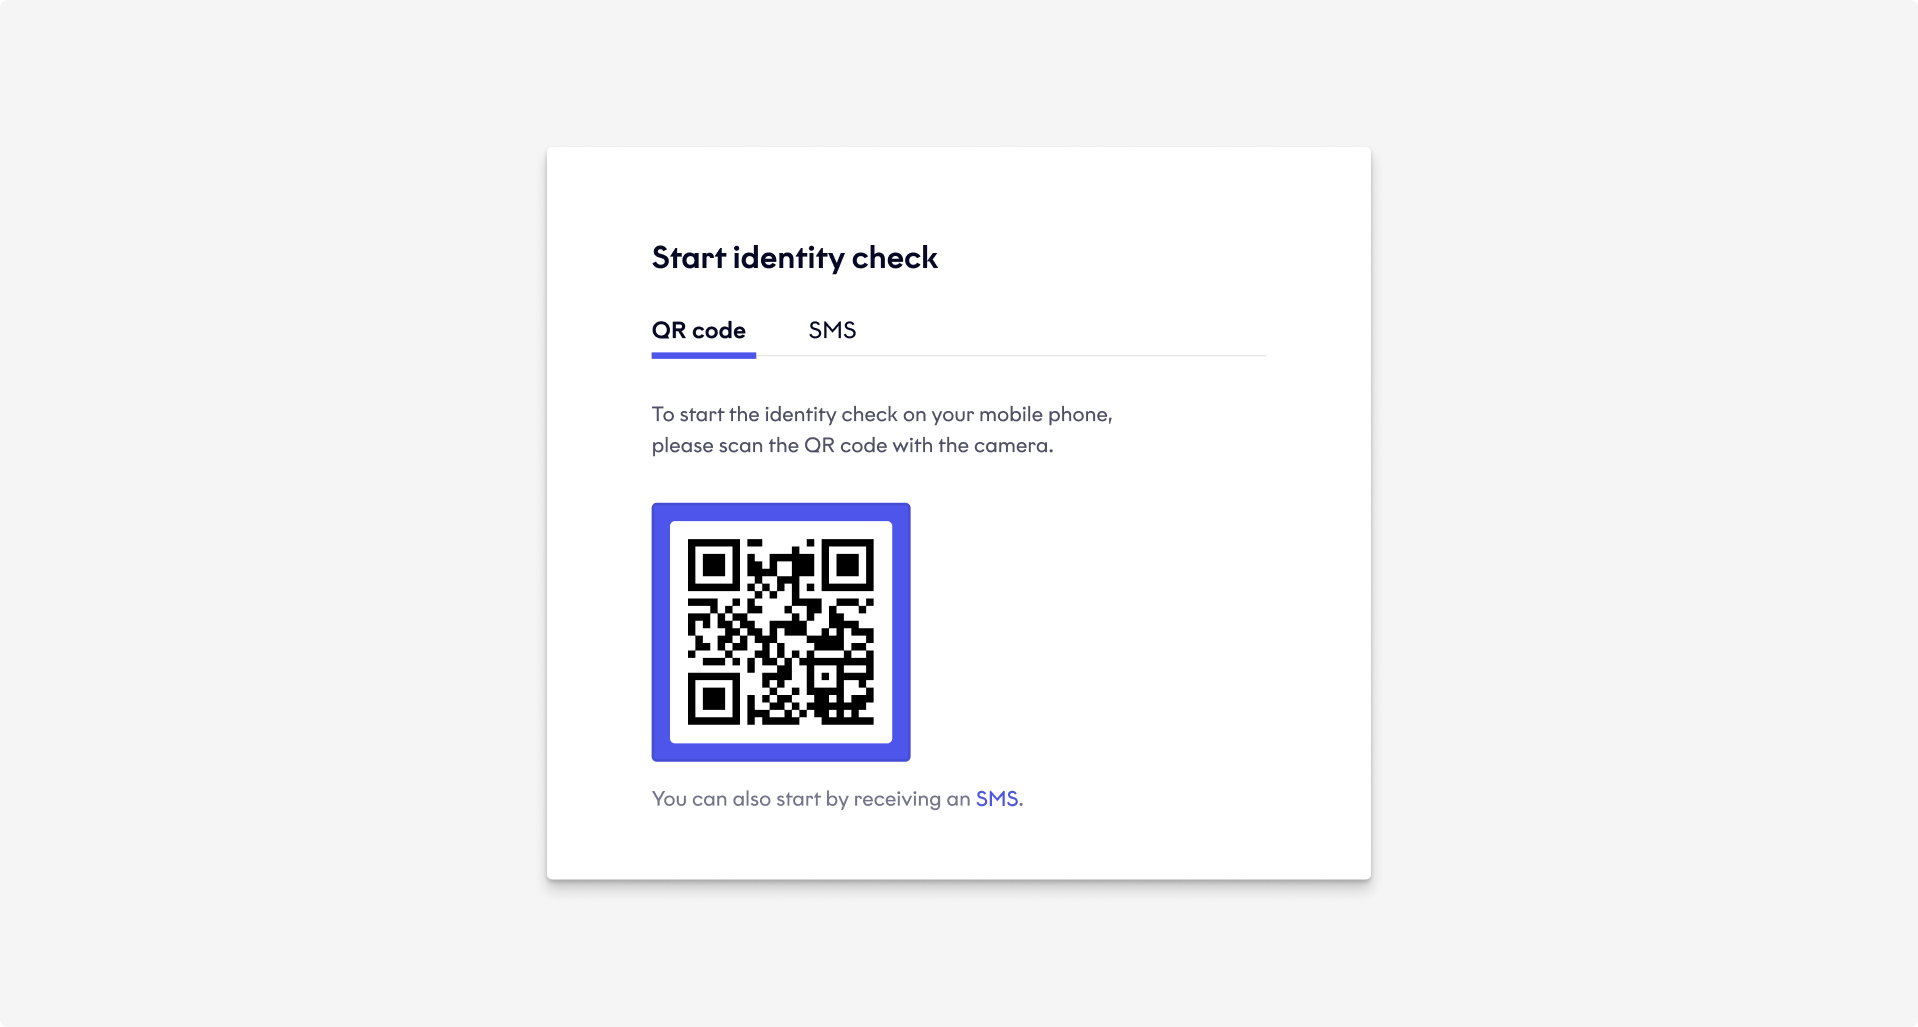
QR code redirect
You display a QR code to the user on your website, which they scan with their mobile device. The QR code is unique for each SDK session.
SMS redirect
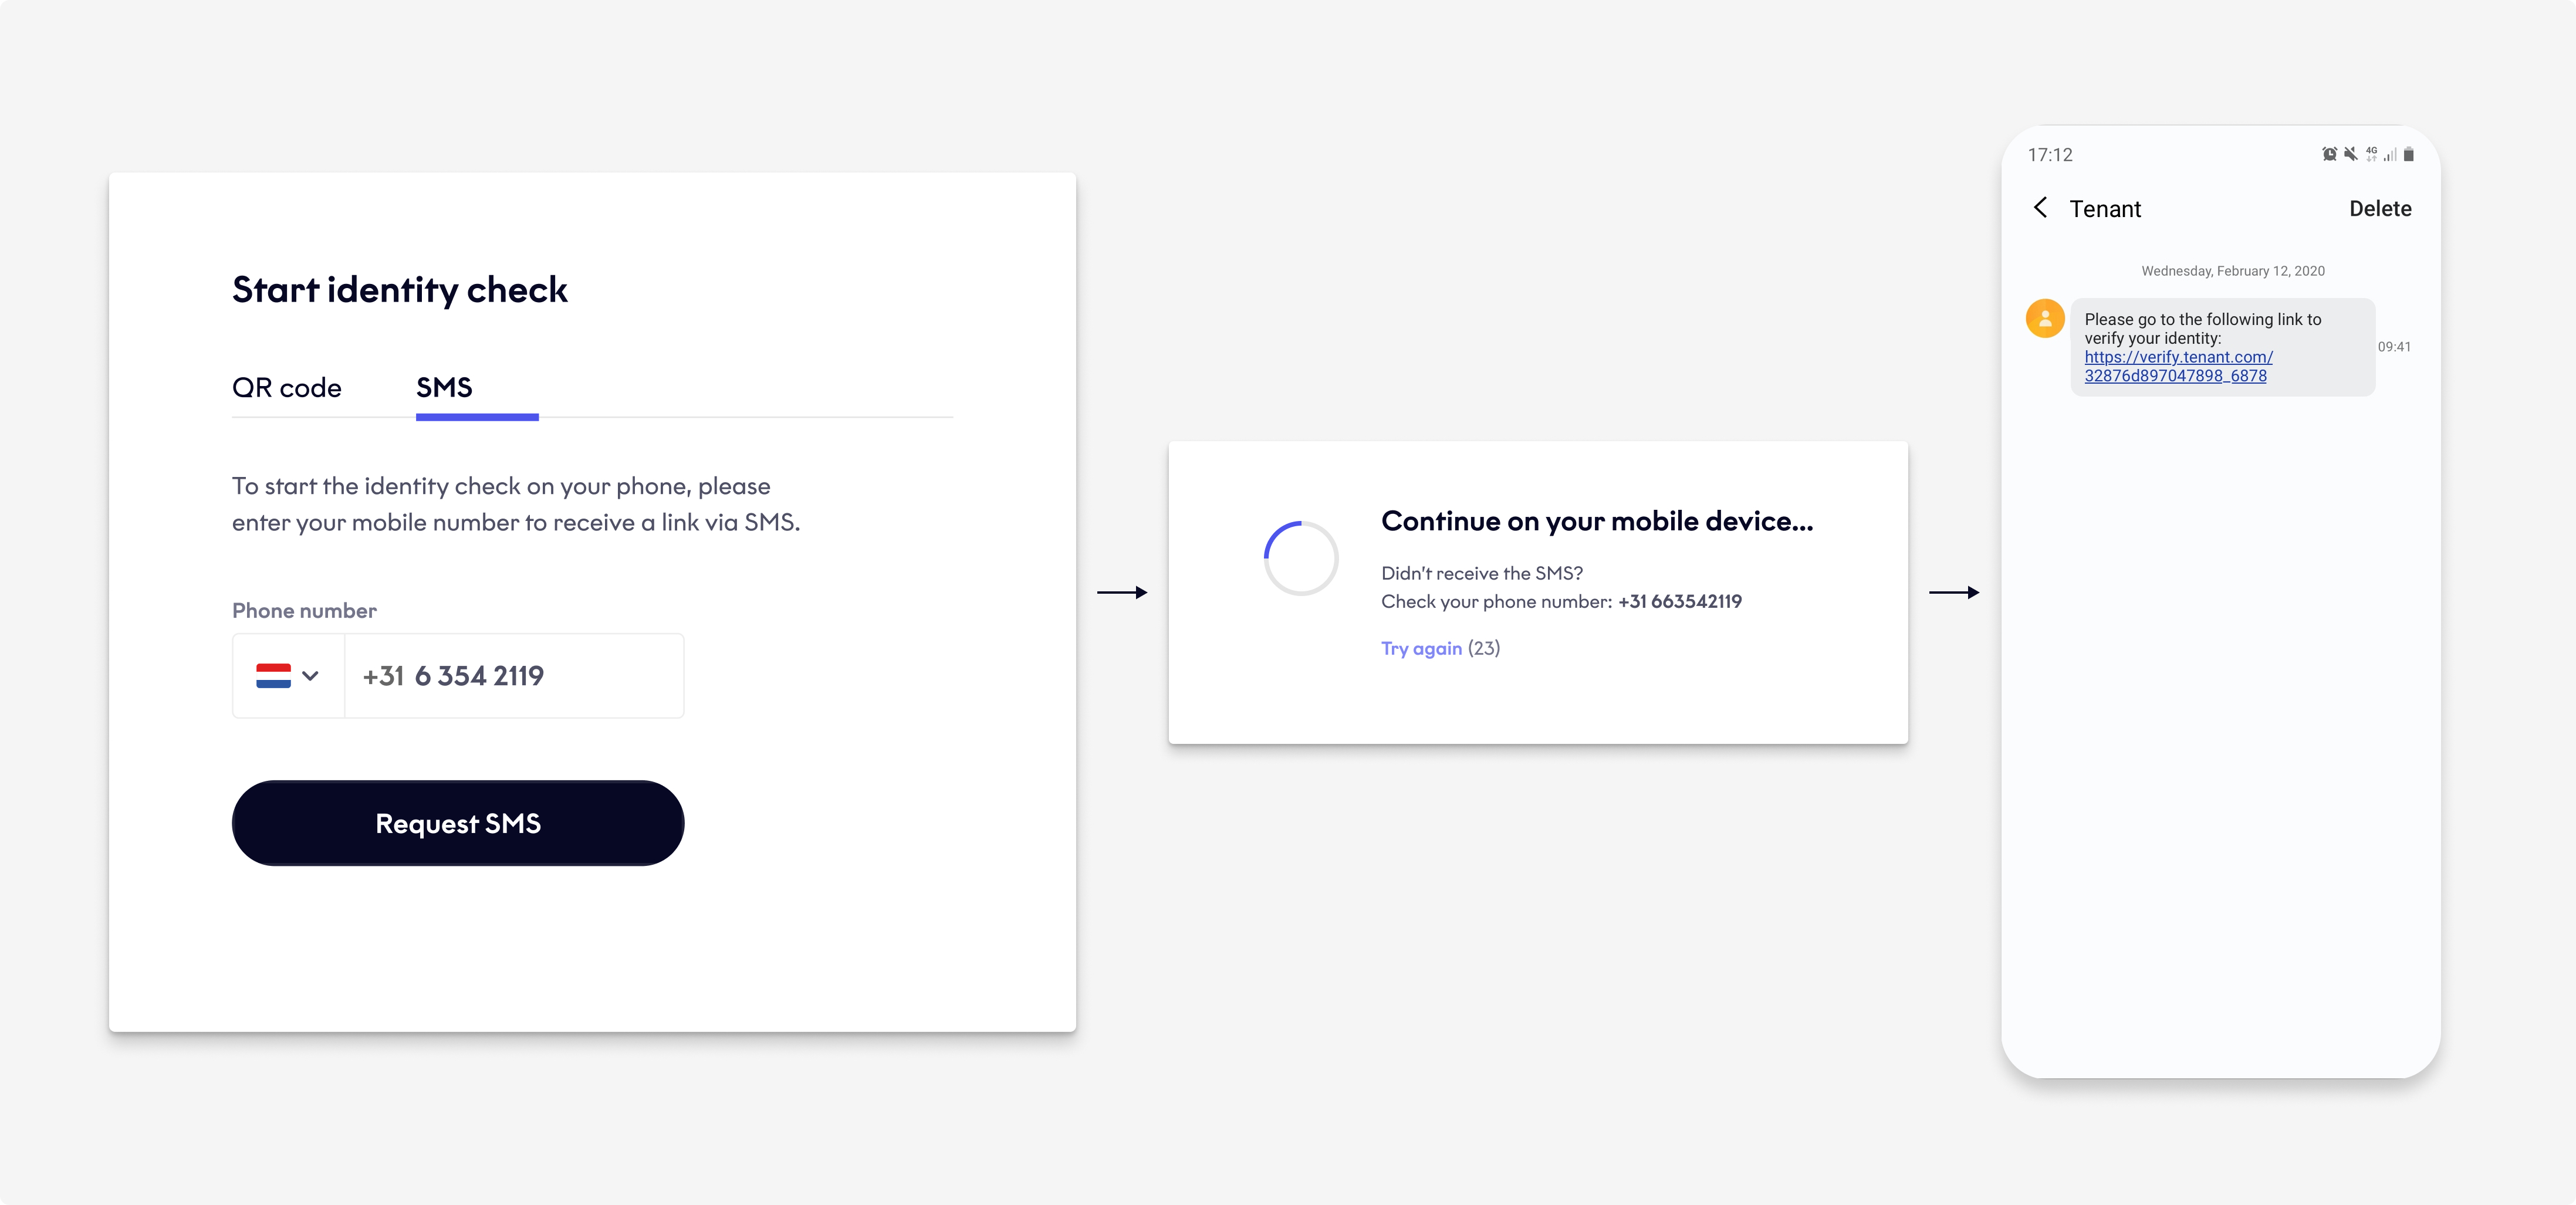
The user receives the workflow URL via SMS.
- The user enters the valid phone number of their mobile device, and then clicks or taps Request SMS.
- While awaiting the SMS, the user can check their mobile phone number is correct.
- If the countdown reaches zero and the user still hasn't received an SMS, they can click or tap Try again to go back and re-enter the phone number.
- The user can re-request the SMS a maximum of 3 times.
Desktop website
If the user is accessing your website via their desktop browser, initialise the Web SDK, display the redirect options, and then redirect the user to the workflow URL in their mobile browser.
Mobile website
If the user is accessing your website via their mobile browser, there are 2 options:
- You display the redirect options, and then redirect them to the workflow URL on your subdomain.
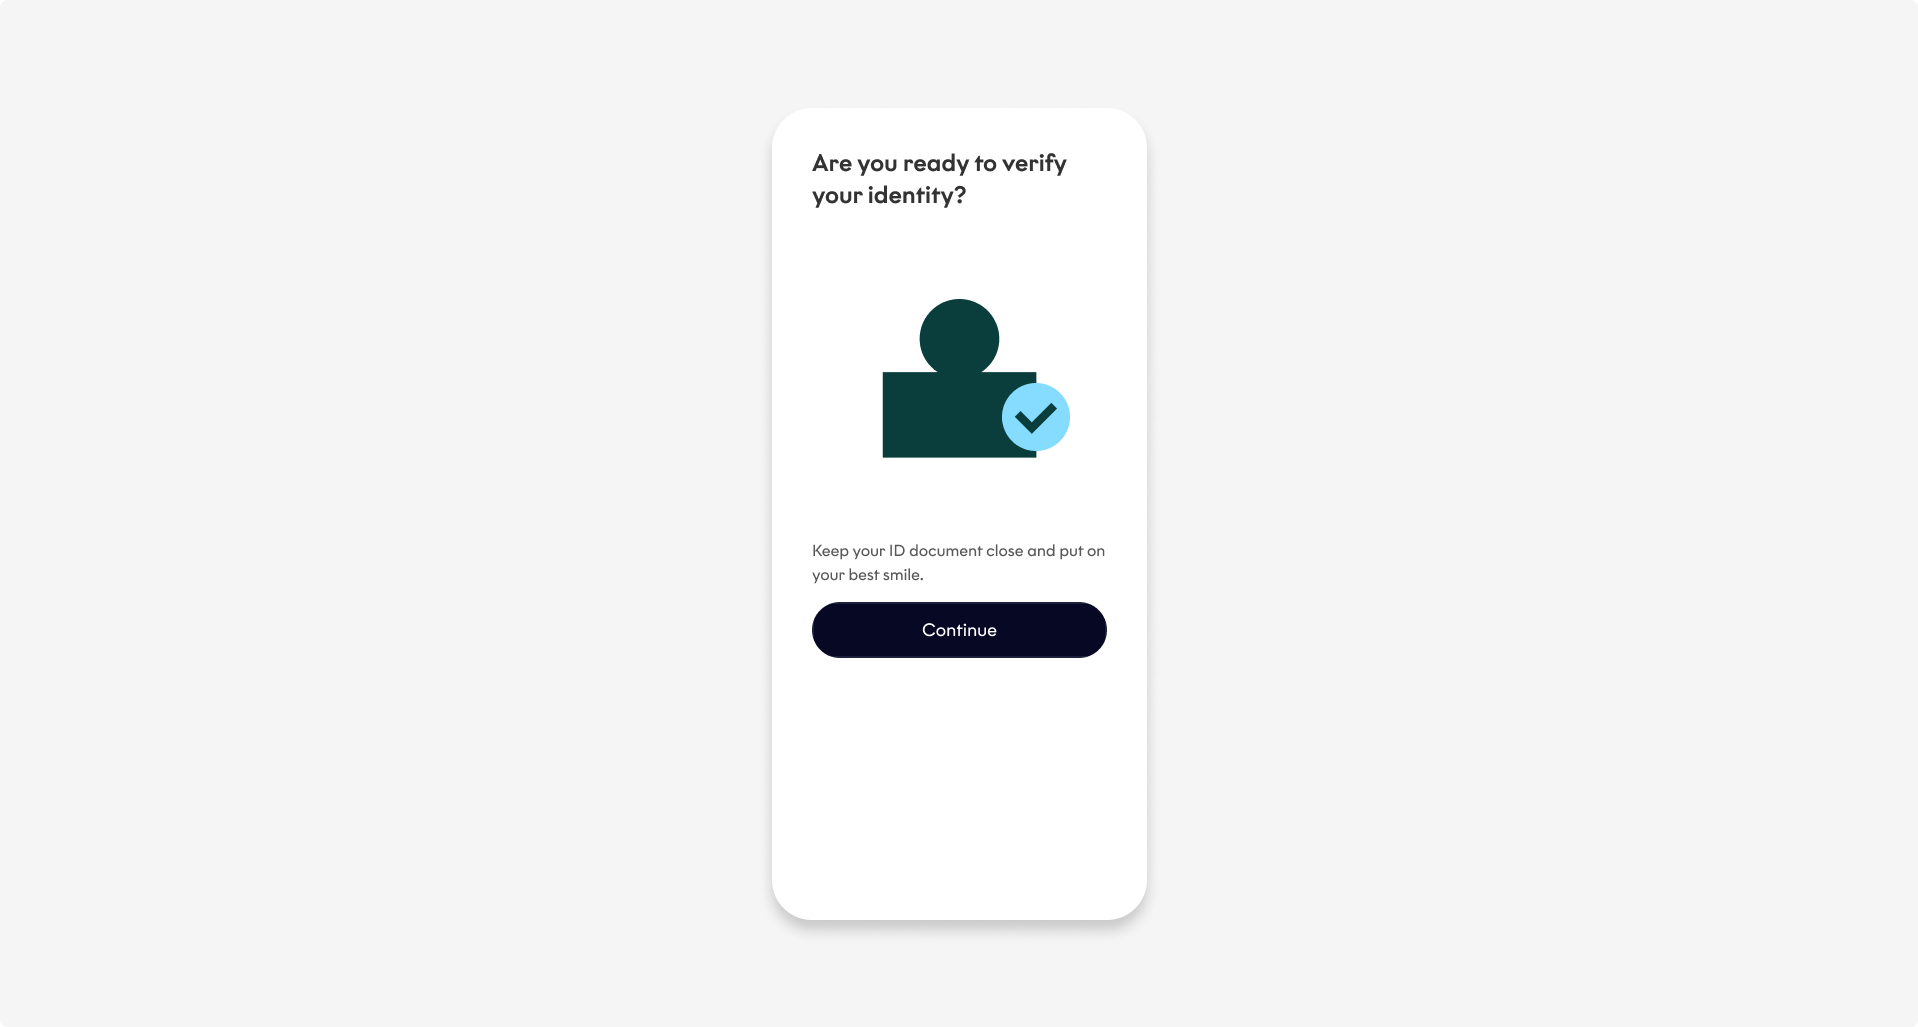
- If the SDK detects the user's mobile device, instead of displaying the redirect options, it displays a Continue to mobile device screen. This creates a better user experience.
Web SDK Integration
To embed the Web SDK into your own application, follow these steps:
1. Import the JavaScript files
Import the following scripts. You can put them in the head or inline in the HTML:
<!DOCTYPE html>
<html lang="en">
<head>

  ...

  <script type="module" src="https://sandbox.v.fourthline.com/v1/build/web-sdk-v2.esm.js"></script>
  <script nomodule src="https://sandbox.v.fourthline.com/v1/build/web-sdk-v2.js"></script>
</head>If using a custom domain or customised Fourthline domain, replace sandbox.v.fourthline.com with the URL of your test or live environment, as agreed with Rabo Identity Services during your onboarding.
The Rabobank Preproduction environment is for implementation only. When you migrate to the production environment, remove Sandbox from the URL.
2. Add the flow tag
Add the custom flow tag to the HTML or in the template of the relevant component.
The tag is only rendered after the source for it is loaded.
<!DOCTYPE html>
<html lang="en">
<head>

  ...

  <script type="module" src="https://sandbox.v.fourthline.com/{version, e.g.v1}/build/web-sdk-v2.esm.js"></script>
  <script nomodule src="https://sandbox.v.fourthline.com/{version, e.g. v1}/build/web-sdk-v2.js"></script>
</head>
<body>

  /* Somewhere in the page */

  <div class="container">
  	<fl-flow-onboarding></fl-flow-onboarding>
  </div>

</body>
</html>
3. Localize the UI
To configure the UI language and level of formality, pass the following attributes to the fl-flow-onboarding component.
| Attribute | Description |
|---|---|
locale | The language for the UI. Format: ISO 3166-1 alpha-2 country code Example: nl |
formality | The level of formality. Enum: • formal, e.g. "u" in Dutch, "tu" in French • informal, e.g. "jij" in Dutch, "vous" in French |
Supported languages and formality:
| Language | Locale | Formality |
|---|---|---|
| English (default) | en | informal |
| Bulgarian | bg | formal |
| Croatian | hr | informal |
| Czech | cs | informal |
| Danish | da | formal |
| Dutch | nl | formal, informal |
| Estonian | et | formal |
| Finnish | fi | informal |
| Flemish | vl | informal |
| French | fr | formal |
| German | de | formal |
| Greek | el | formal |
| Italian | it | informal |
| Polish | pl | informal |
| Portuguese | pt | formal |
| Maltese | mt | formal |
| Norwegian (Bokmål) | nb | formal |
| Romanian | ro | formal |
| Slovak | sk | informal |
| Spanish | es | informal |
| Turkish | tr | formal |
Example code:
<fl-flow-onboarding
  locale="nl"
  formality="formal"
></fl-flow-onboarding>If you don't set the locale attribute, we check if the browser settings locale is:
- Supported: We set the browser settings as the SDK
locale. - Not supported: We check the
langattribute in thehtmltag.
If the lang attribute is:
- Supported: We set it as the SDK
locale. - Not supported: The SDK
localedefaults toen(English).
You can set the locale and formality dynamically.
The fl-flow-onboarding component exposes a setLocale JavaScript method, which accepts new supported locale and formality as arguments.
If not supported, the fallback flow is triggered.
Example code:
const elem = document.getElementsByTagName("fl-flow-onboarding")[0];
elem.setLocale("fr"); // Setting French
elem.setLocale("fr", "formal"); // Setting French (formal)
The mobile device flow locale is set when the redirect flow (fl-flow-onboarding) is rendered for the first time.If you set the locale dynamically afterwards, it isn't updated for the mobile device flow. This can create a less optimal user experience, so we recommend setting the redirect flow locale via HTML before loading the SDK
4. (Optional) Configure QR/SMS tabs
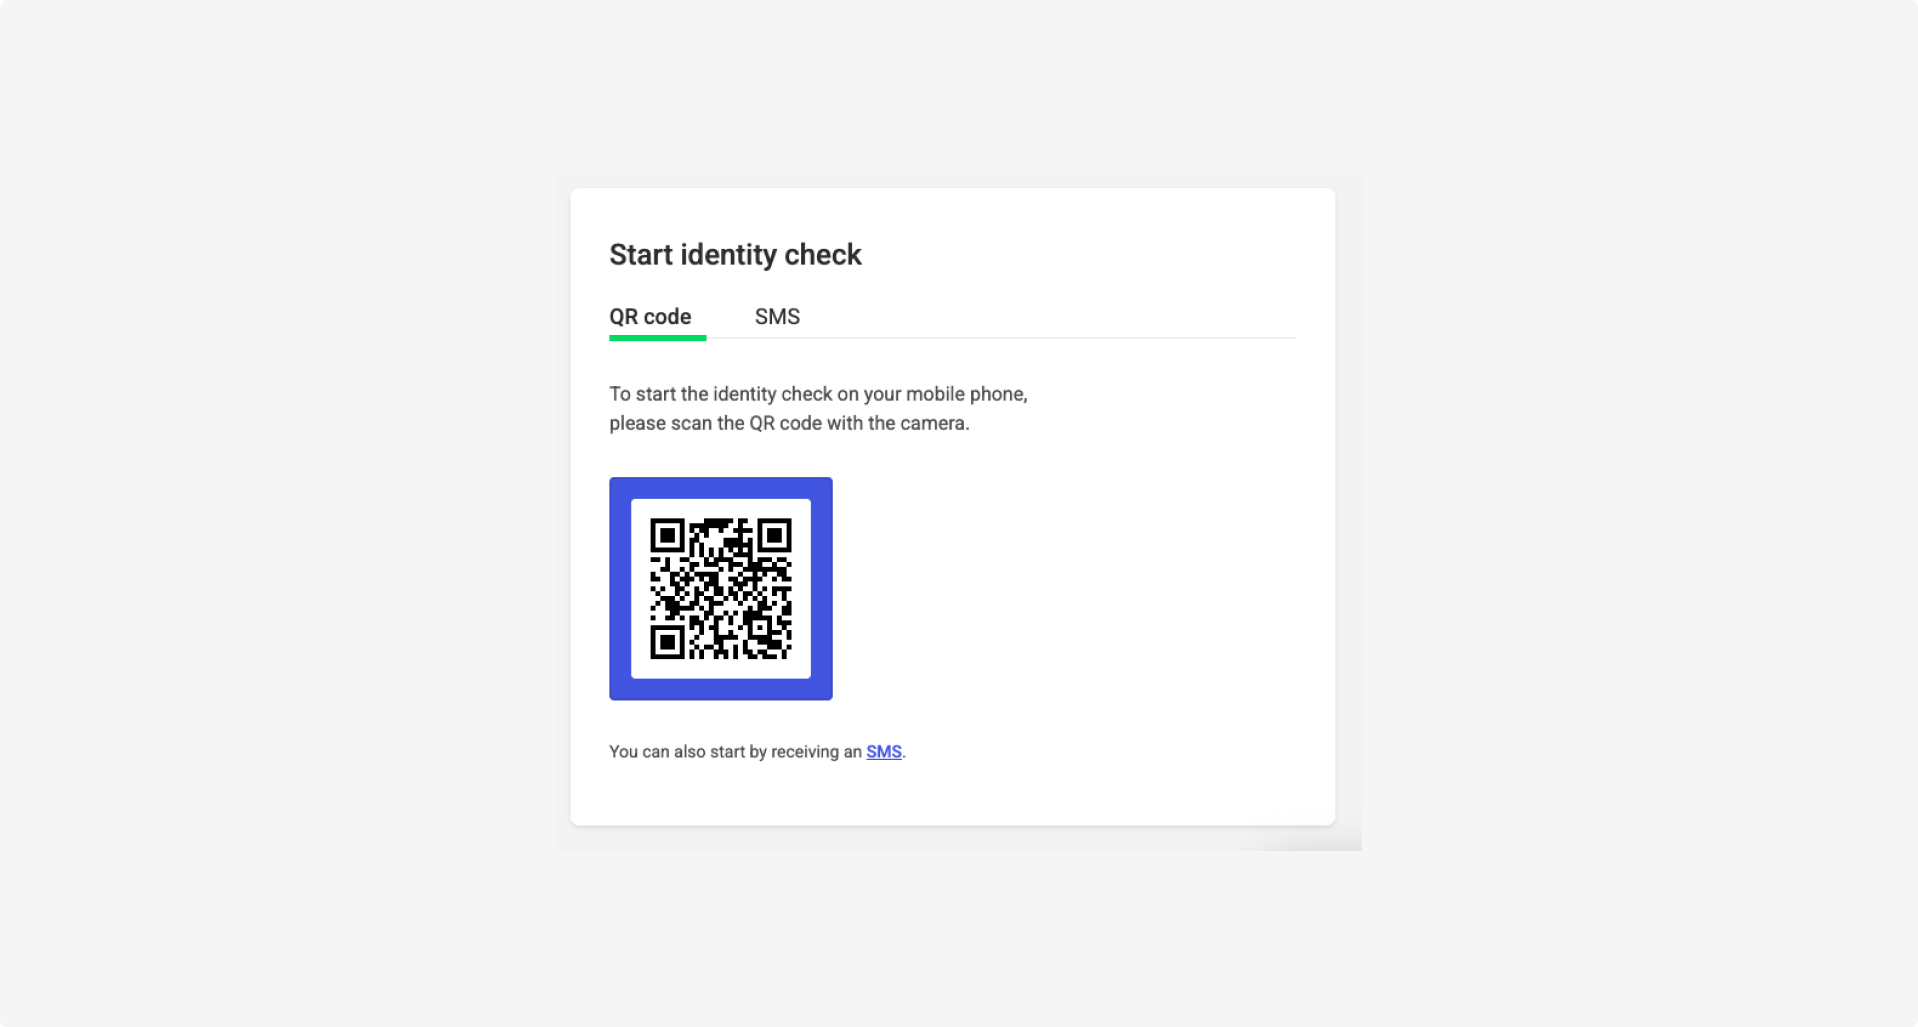
Choose which initiation methods are available to clients when starting the workflow. By default, both QR code and SMS options are displayed.
Use the tabs attribute on the<fl-flow-onboarding> component to control which tabs are shown:
| Configuration | Description |
|---|---|
tabs='["qr"]' | Show only QR code option |
tabs='["sms"]' | Show only SMS option |
tabs='["qr","sms"]' | Show both options (explicit) |
No tabs attribute | Show both options (default behavior) |
QR code and SMS tabs are configured
Example code:
const onboarding = document.createElement('fl-flow-onboarding');
// This will not work
onboarding.setAttribute('tabs', JSON.stringify(['qr']));
// This works
onboarding.tabs = ['qr'];
<!-- Show only QR tab -->
<fl-flow-onboarding tabs='["qr"]' token="YOUR_TOKEN"></fl-flow-onboarding>

<!-- Show only SMS tab -->
<fl-flow-onboarding tabs='["sms"]' token="YOUR_TOKEN"></fl-flow-onboarding>

<!-- Show both -->
<fl-flow-onboarding tabs='["qr","sms"]' token="YOUR_TOKEN"></fl-flow-onboarding>

<!-- OR default behavior - "no tabs" (Show both)  -->
<fl-flow-onboarding token="YOUR_TOKEN"></fl-flow-onboarding>
5. Link to the workflow
To link the redirect flow (fl-flow-onboarding) to the workflow, pass the validationCode returned in the Create workflow response to the component.
Either set the validationCode as an HTML attribute:
<!DOCTYPE html>
<html lang="en">
<head>

  ...

  <script type="module" src="https://sandbox.v.fourthline.com/{version, e.g.v1}/build/web-sdk-v2.esm.js"></script>
  <script nomodule src="https://sandbox.v.fourthline.com/{version, e.g. v1}/build/web-sdk-v2.js"></script>
</head>
<body>

  /* Somewhere in the page */

  <div class="container">
  	<fl-flow-onboarding token="{validationCode}"></fl-flow-onboarding>
  </div>

</body>
</html>Or, set the token in JavaScript:
const flow = document.getElementById('onboarding-flow');

flow.setToken('TOKEN_OF_THE_VERIFICATION');The validationCode is single use. If you use server-side rendering, you must ensure the code is consumed after it reaches the client.
6. Redirect to mobile onboarding
When redirecting the client to the workflow from their mobile browser, the SDK emits an fl-flow-onboarding event (mobile/desktop).
If we detect the client's mobile device, we display a Continue to mobile device screen with a Continue button.
When the client taps Continue, the SDK emits an flContinueMobileRequest event.
For the client to start the workflow, you must handle the flContinueMobileRequest event in your backend. If you don't handle it, the flow doesn't start and it appears to the client that the Continue button doesn't work.
The flContinueMobileRequest event contains a redirectHandler function in the event.detail payload. This function specifies what the SDK should do when the client completes the workflow.
If you provide URLs to your Success page and Failure page, the SDK redirects the client there. If you don't provide them, we display a message telling the client they have completed the flow and should return to your website.
To start the workflow in a new browser tab, call the redirectHandler function without providing success or failure page URLs.
document.addEventListener('flContinueMobileRequest', (e) => {
  const redirectHandler = e.detail;
  redirectHandler();
});
To start the workflow in the same browser tab, call the redirectHandler function and provide the URLs to your:
- Success page by setting the
redirectproperty - Failure page by setting the
redirectFailureproperty
The URLs must be valid and include the schema.
Starting the workflow in the same browser tab overwrites the state of that page, which you may want to handle first.
Example code:
document.addEventListener('flContinueMobileRequest', (e) => {
  const redirectHandler = e.detail;
  redirectHandler({
    redirect: 'https://yoursuccesspage.com/onboarding?done=true',
    redirectFailure: 'https://yourfailurepage.com/onboarding?done=false',
  });
});To increase security, consider using the URL API. See Mozilla Developer – URL API.
7. Handle status events
At each step of the workflow, the SDK emits an flOnboardingStatus event (desktop) that you can subscribe to.
You can use the status to trigger any required actions on your side, e.g. when you receive OnboardingStarted status and before you receive Loaded status, you could display a ghost placeholder image.
The flOnboardingStatus event emits the following statuses:
| Event status | Description |
|---|---|
OnboardingStarted | The validation code has been used. |
Loaded | The SDK is loaded and the redirect options are displayed to the client. |
OnboardingContinuing | The client has been successfully redirected and has started the workflow. |
OnboardingCompleted | The client has successfully completed the workflow. Suggested action: Redirect the client to your Success page or email them about next steps. |
OnboardingCompletedError | The client has completed the workflow with one or more errors and we have displayed the Failure screen. Suggested action: Redirect the client to your Failure page or email them about next steps. |
To listen to this event, add the following JavaScript snippet to your website HTML.
For each event status, define and implement the required behavior on your side.
Example code:
document.addEventListener('flOnboardingStatus', (event) => {
  const { detail: status } = event;
  if (status === 'Loaded') {
    // Put your code here
  }
  if (status === 'OnboardingCompleted') {
    // Put your code here
    // e.g. Remove the fl-flow-onboarding element from the DOM and render your success page
  }
  if (status === 'OnboardingCompletedError') {
    // Put your code here
  }
});
8. Handle restart event
If the client requests to restart the redirect flow, the SDK emits an flOnboardingRestartRequest event (desktop) that you can subscribe to and handle. It is triggered from the error screen when the client taps Try again and the flow has encountered a non-recoverable error.
This event doesn't emit any values.
To handle this event:
-
Listen to it.
-
Create a new workflow.
-
Create a new SDK session.
-
To set the new validation code, either:
- Invoke the
setToken(newValidationCode)method, or - Replace the existing HTML tag with a new tag containing the updated
<fl-onboarding token="newValidationCode"></fl-onboarding>token.\
Example code:
document.addEventListener('flOnboardingRestartRequest', () => {
  const onboardingTag = document.getElementBy('fl-onboarding');

  // Generate a new validation and validation code

  onboardingTag.setToken(newValidationCode);
});You have configured and setup the Web SDK.